Connecting RStudio, Git, and GitHub
This guide provides a detailed, beginner-friendly workflow for connecting RStudio to Git and GitHub. We will use the usethis R package to handle most of the complex steps automatically.
Prerequisites: Install Helper Packages
We will use the usethis and gitcreds packages to simplify the setup. Run this code in the RStudio Console to install and load them.
install.packages(c("usethis", "gitcreds"))
library(usethis)
library(gitcreds)
Part 1: One-Time Setup
You only need to do this part once on your computer.
Step 1: Install Git on Your Computer
Git is a separate program from R and RStudio. You must install it first.
- Go to the official Git website: https://git-scm.com/downloads
- Download the installer for your operating system (Windows or macOS).
- Run the installer, accepting all the default options. You don’t need to change anything.
Step 2: Configure Git with Your Identity
Open the RStudio Console and run the following two lines of code, replacing the example text with your actual GitHub username and email. This is how your commits will be identified.
# Replace with your info
edit_git_config()
This will open a text file for Git’s global configuration. Add the following lines, save the file, and close it.
[user]
  name = "Your Name"
  email = "your.email@example.com"
Step 3: Connect RStudio to GitHub with a Personal Access Token (PAT)
GitHub requires a special password called a Personal Access Token (PAT) to connect with tools like RStudio. The usethis package makes this easy.
Generate the Token: In the RStudio Console, run this command. It will open a new tab in your web browser, taking you to the “New personal access token” page on GitHub.
create_github_token()Configure the Token on GitHub:
- In the “Note” field, give your token a descriptive name, like “RStudio Token”.
- For “Expiration,” it is recommended to set a custom date (e.g., the end of the semester).
- Under “Select scopes,” check the box next to
repo. This gives your token permission to access your repositories. - Scroll to the bottom and click “Generate token”.
Copy the Token: You will now see a new page with your token. It will look something like
ghp_.... This is the only time you will ever see this token. Click the copy icon next to it.Save the Token in RStudio: Go back to RStudio and run the following command in the Console. It will prompt you to paste your token. Paste it and press Enter.
gitcreds_set()
You are now fully configured! RStudio can securely talk to your GitHub account.
Part 2: Creating and Connecting a Project
This is the workflow you will use for each new project (like your course journal).
Step 1: Create a New RStudio Project
First, create a new, empty RStudio Project. Do not initialize it as a Git repository yet.
- In RStudio: File → New Project → New Directory → New Project.
- Give it a name (e.g.,
my-journal-project) and save it somewhere you can find it.
Step 2: Turn the Project into a Git Repository
In the RStudio Console, run this command:
use_git()This will initialize a Git repository in your project folder. RStudio will ask to restart. Click “Yes.” When it reopens, you will see a Git tab in the top-right pane.
Step 3: Create a GitHub Repository and Connect It
Now, tell usethis to create a repository on GitHub and connect your local project to it.
use_github()This command will: 1. Ask if you want to commit the files you have. Say “Yes”. 2. Create a new, private repository on your GitHub account with the same name as your RStudio project. 3. Push your local files to the new GitHub repository.
When it’s done, it will open a new browser tab showing you your new repository on GitHub, with your files already in it.
Part 3: The Daily Workflow (Pull, Stage, Commit, Push)
Now that your project is connected, here is the simple, day-to-day workflow for saving your work. This is a cycle you will repeat many times.
- Pull: Before you start working, click the blue Pull arrow in the Git pane. This downloads the latest changes from your GitHub repository. This is crucial if you work on multiple computers or collaborate with others.
- Do Your Work: Edit your files, write your journal entries, analyze data, etc. Save your files as you normally would.
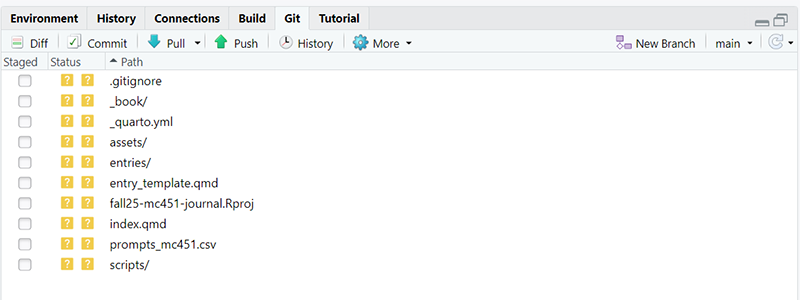
- Stage Your Changes:
- Go to the Git pane. You will see a list of all the files you’ve modified since your last commit.
- Check the boxes under the “Staged” column for all the files you want to include in your next save point. “Staging” files is like putting them in a box to get them ready to ship.
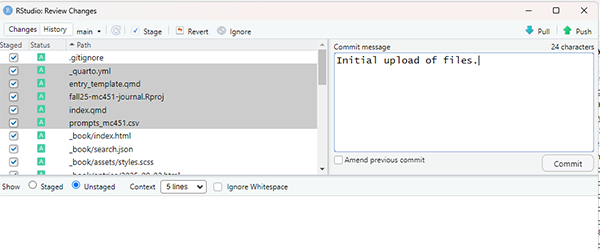
RStudio Stage Window - Commit Your Changes:
- Click the Commit button.
- A new window will open. In the “Commit message” box, write a short, descriptive message about what you changed (e.g., “Completed Week 3 journal entry”). This message is a log for your future self.
- Click Commit. This creates a “save point” (a commit) on your local computer. Your changes are not on GitHub yet.

RStudio Commit Window - Push to GitHub:
- Click the green Push arrow. This sends your committed changes from your local computer up to your GitHub repository, making them available online.
That’s it! You have successfully saved and backed up your work to GitHub.
Troubleshooting
Here are a few common issues you might encounter.
use_github()fails: If this command fails, it might be because a repository with that name already exists on GitHub. Make sure the name is unique. It could also fail if your PAT is incorrect. You can re-rungitcreds_set()to enter it again.Accidentally committed a large file: Git is not designed for large data files (e.g., >100MB). If you accidentally commit one and the push fails, you will need to remove it from the repository’s history. The easiest way is to use the
r-lib/bfg-managerpackage or follow GitHub’s official guide. The best practice is to add the paths to large files or data folders to a.gitignorefile before you commit them.Merge Conflicts: If you
Pulland get a “merge conflict,” it means you and a collaborator (or you on another computer) edited the same lines in the same file. RStudio will show you the conflicting sections in the file. You must manually edit the file to resolve the differences, save it, and then commit the resolved file.